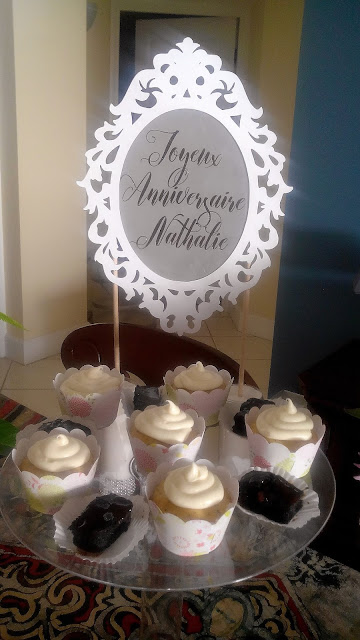
Hi guys! It's been a while. I have been crazy busy and time just seems to be flying by. I had to whip up a quick dessert table for a friend's birthday and had a fun time creating the main sign for the table. It was so beautiful and I cannot wait to make another! This piece is very versatile and can be used for a number of occasions both for adults and for kids, whether it's a birthday, anniversary, baby shower etc. I did it in classic white and it was stunning. 13" in length and cut with my electronic machine. Let me walk you through my process
First I googled and downloaded the mirror image which was offered for free use. I sized it to fit on my mat and cut four pieces out using the thickest board that I had. Then using glue I carefully glued each layer together making sure to carefully line them up. I wanted a semi transparent look for the middle so I printed my greeting on vellum and foiled the insert in gold
After giving the layers some time to dry I used my hot glue gun and adhered two dowel rods to the back to give it support and to use as part of the stand for my display. Make sure your dowels are evenly cut so that your sign won't be lopsided. I used repositionable glue so that I can remove the vellum and re-use the outer frame for a different occasion :)
Lastly, I placed each dowel rod in two tall vases and filled them with white sugar to securely hold the sign in place. It had a beautiful wow factor and everyone loved it! This is an easy project to make. Let me know if you try this project. Happy crafting!


No comments